
Why we need dependency injection
1. Dependency
Dependency is the connection between modules, take BookList module for example, it needs lots of services, such as:
- Network for data retrieving
- Track for event tracking
- UserDefault for simple configuration
- Notification Center for notification
let’s take Track as an example, maybe we are now using AppCenter as our tracking platform (it can be newrelic or any other platforms), and have codes in our project like this:
1
2
3
4
5
6
7
8
9
10
11
12
13
14
15
public struct AppCenterTracker {
    public func logEvent(_ name: String, info: [String: String] = [:]) {
        //
    }
}

// used in other module such as BookList
struct BookListViewModel {
    private let tracker = AppCenterTracker()

    func loadBookList() async throws {
        tracker.logEvent("Load book list")
    }
}
The weakness of concreting tracker with specific implementation is obviously and it will be painfull if we change our tracking platform from AppCenter to Newrelic. so usually we use protocol oriented programming in Swift, here is the example.
1
2
3
4
5
6
7
8
9
10
11
12
13
14
15
16
17
18
19
20
21
22
public protocol TrackingAPI {
    func logEvent(_ name: String, info: [String: String])
}

public struct AppCenterTracker: TrackingAPI {
    public func logEvent(_ name: String, info: [String: String] = [:]) {
        //
    }
}

struct BookListViewModel {
    private let tracker: TrackingAPI

    init(_ tracker: TrackingAPI) {
        self.tracker = tracker
    }

    func loadBookList() async throws {
        tracker.logEvent("Load book list", info: [:])
    }
}
There are two types of dependency injection:
- initializer based
- factory based
If there are only couple of dependencies needed, just like the tracker above, we can use the initializer based injection, and use factory based injection in more dependencies case.
2. Benefits of dependency injection
Let’s recap the benefits of dependency injection here:
1. De-coupling
Using protocol instead of concrete implementation to de-couple the service user from service provider, will result in a flexibility of potential change
2. Testable
Mocked service provider can be easly used in unit test
How to create a dependency injection factory
Let’s create a simple dependency injection factory step by step.
1. Interface
first we need to figure out the interface, and it is obviously simple.
1
2
3
4
public protocol ServiceAPI {
    func registerService<T>(_ type: T.Type, _ builder: @escaping () -> T)
    func getService<T>(_ type: T.Type) -> T
}
2. Factory or singleton
There can be two types of service provider we can use, Factory or Singleton. The servcie we get from a Singleton provoder is always the same instance while we get a new instance of service everytime from a Factory provider.
It’s usually a Singleton provider we needed, and we can easily extend our service by adding a new parameter in registerService like this.
1
2
3
4
enum ServiceType {
    case factory, singleton
}
func registerService<T>(_ type: T.Type, _ service: ServiceType = .singleton, _ builder: @escaping () -> T)
Now we just create a singleton service.
3. Public and private
Sometimes we need to share some open services among modules and hide the services only used within a module internally, just like this.
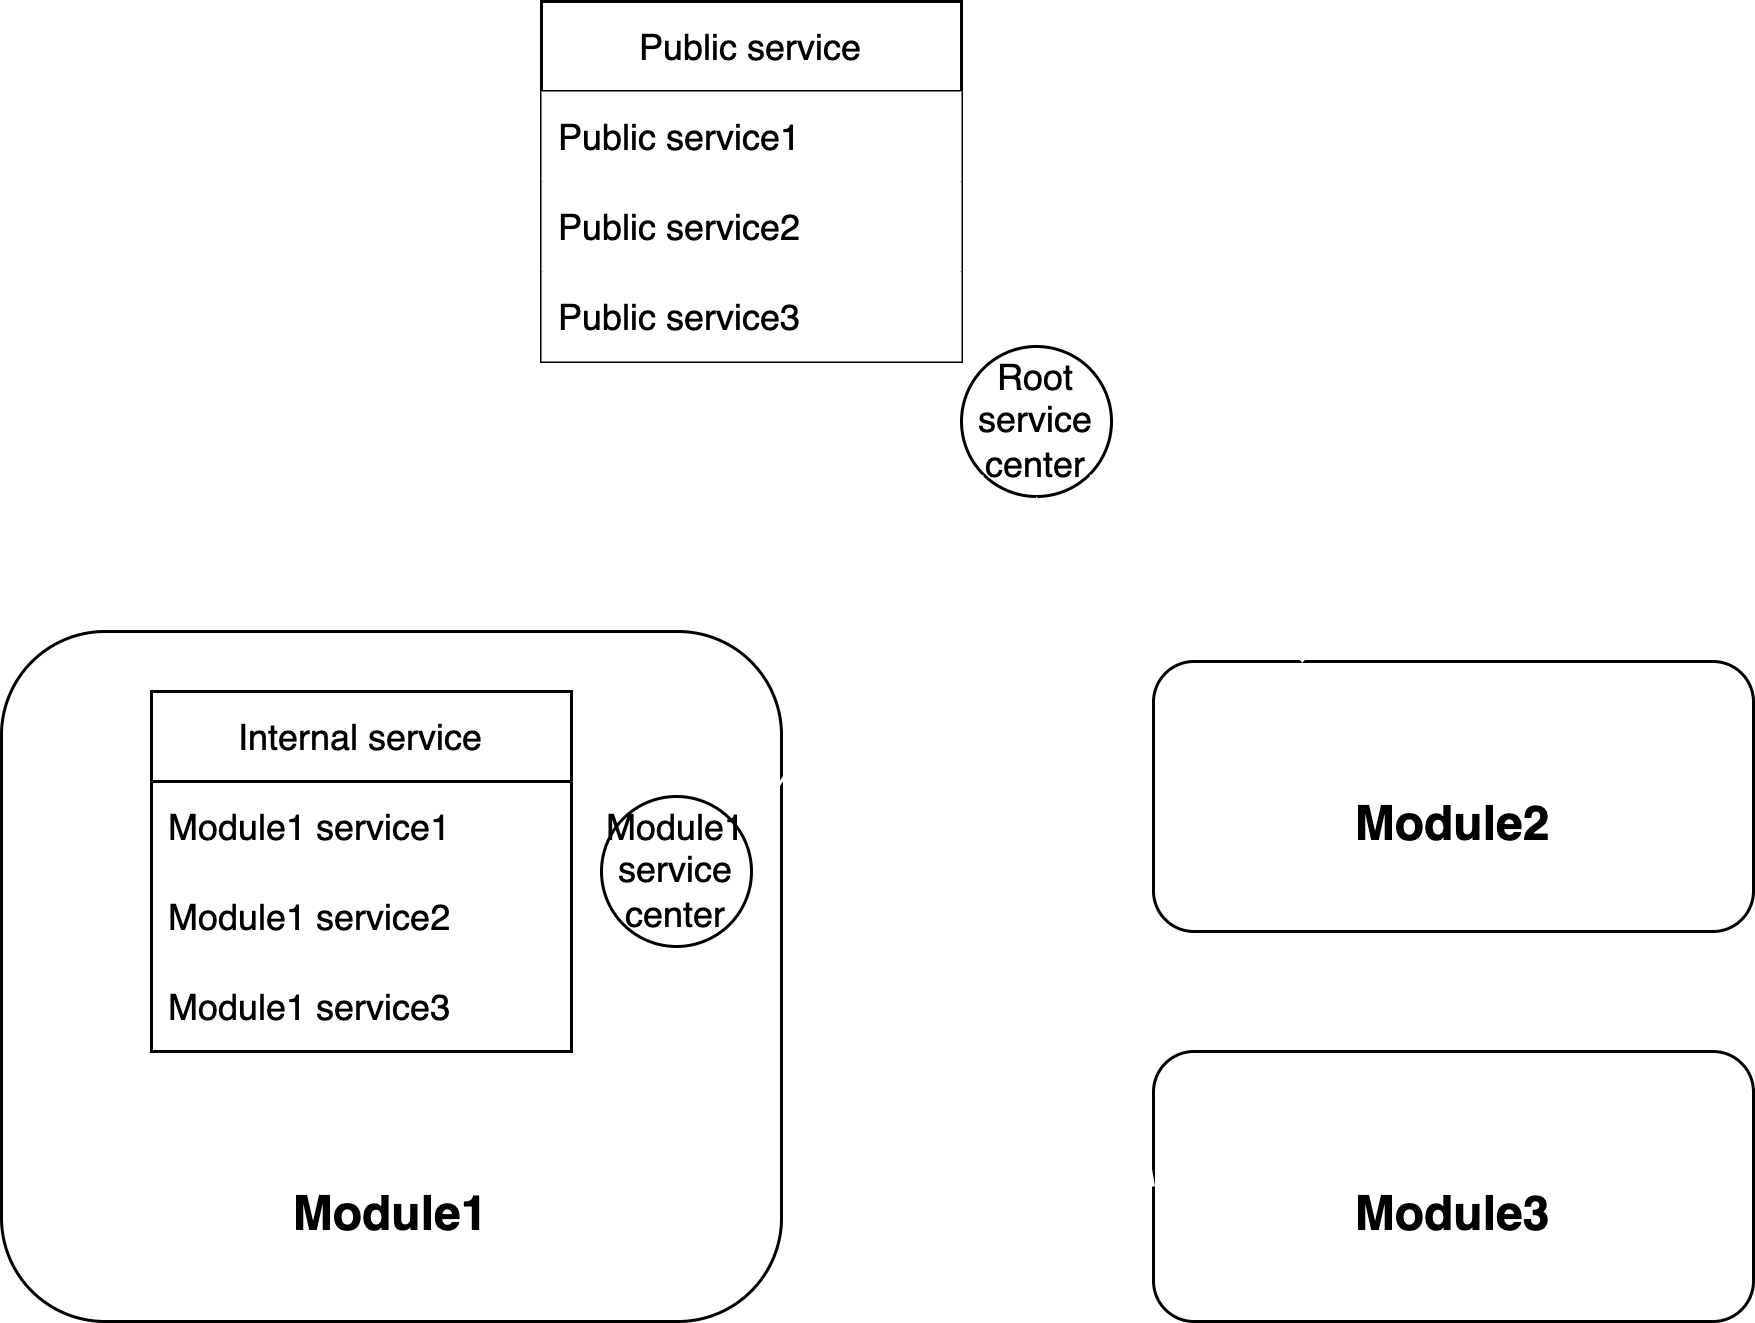
Other modules such Module2 and Module3 can only get access the public services rather than private services provided by Module1.
While within Module1, as a up-forward looking up, both private services and public services can be accessed.
4. Practice
- Create Swift Package and design interface
- How to save
keyandclosure
- Tree